How to Edit a Picture in Microsoft Word
It is easy to edit a picture in Microsoft Word.
You don't have to use photo-editing software, such as Photoshop, to edit a picture and then insert it into the Word document.
Microsoft Word allows you to:
- remove parts of the picture you do not want (e.g., the background)
- change the brightness, sharpness and contrast to improve the picture
- change the color
- change the way the picture is presented (e.g., as a sketch)
- compress the picture, that is, reduce its file size
- manage the transparency, that is, how much you can see through it
- change the border
- crop (remove portions) of the picture
- change the height and width of the picture
There is much Microsoft Word can do for you.
Remove Background
One of the tools available if you want to edit a picture in Microsoft Word is "Remove Background".
You can remove the background presented by Microsoft Word, that is, the magenta (reddish-purple) - see Figure 1.
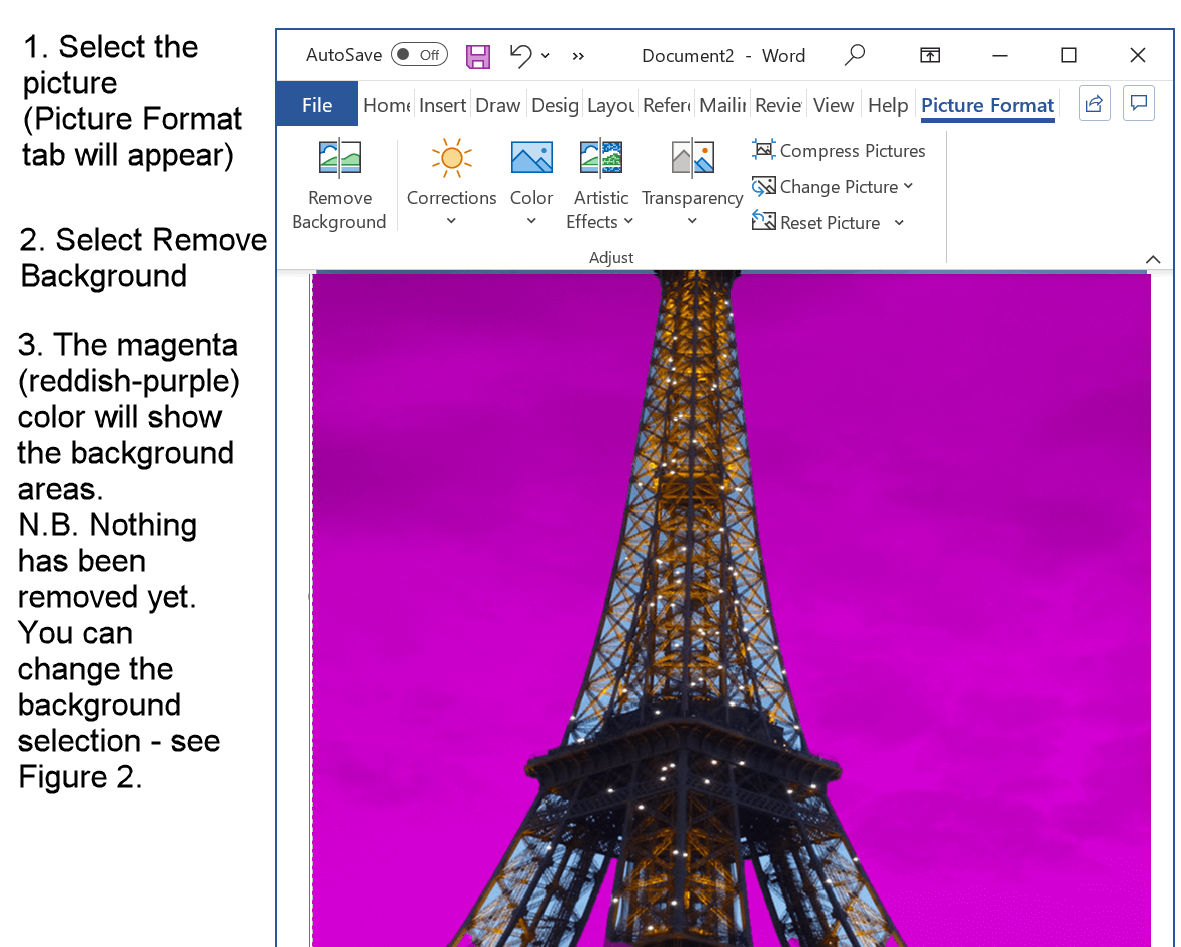 Figure 1: Remove the Background From a Picture in a Word Document
You can change the default background (the magenta colored areas) if you wish.
You could select magenta colored parts of the background you wish to keep, or you could select other parts (not magenta colored) to remove (see Figure 2).
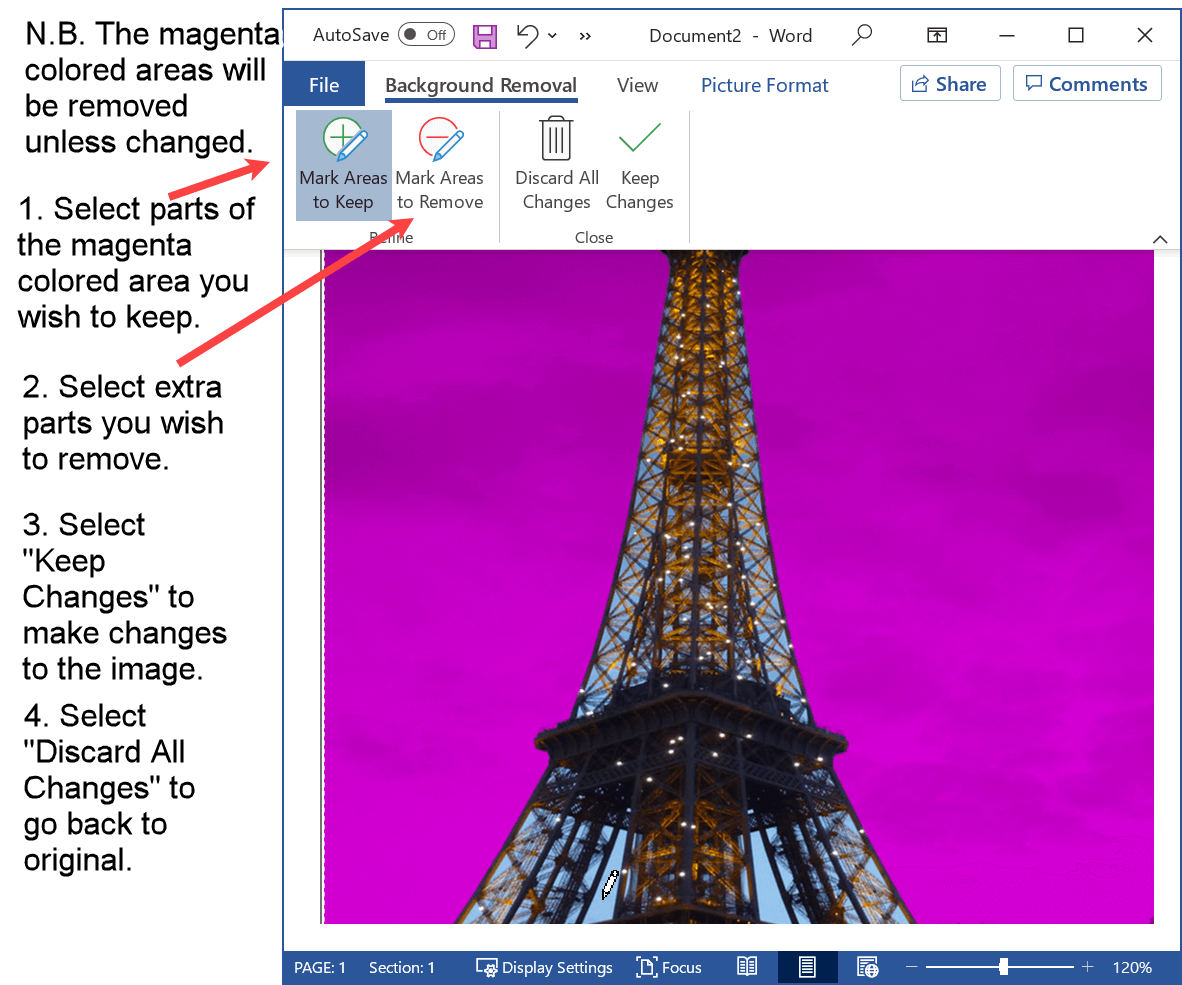 Figure 2: Remove the Background From a Picture in a Word Document
The result of removing the background is shown in Figure 3.
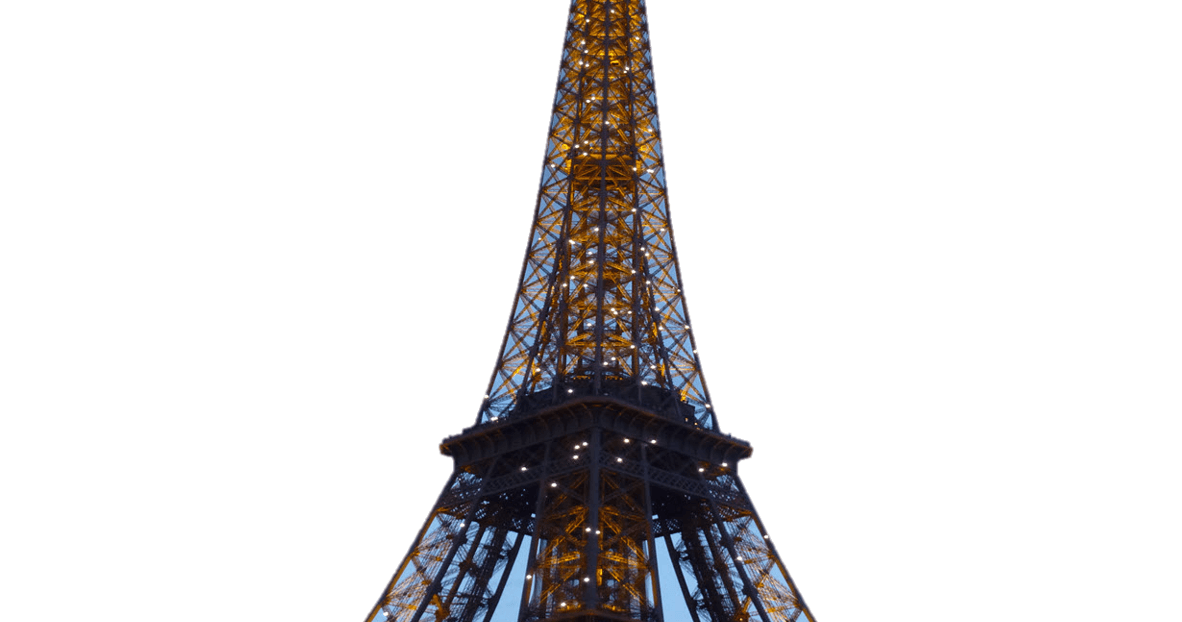 Figure 3: Eiffel Tower With the Background Removed Using Microsoft Word
Adjust Brightness, Contrast or Sharpness
You can edit a picture in Microsoft Word to change the following:
- sharpness (i.e., the clarity)
- brightness (i.e., how much darkness or light)
- contrast (i.e. difference in brightness between objects or regions)
Use the "Corrections" tool to edit a picture in a Word document (see Figure 4) so that the sharpness, brightness, and contrast are to your liking.
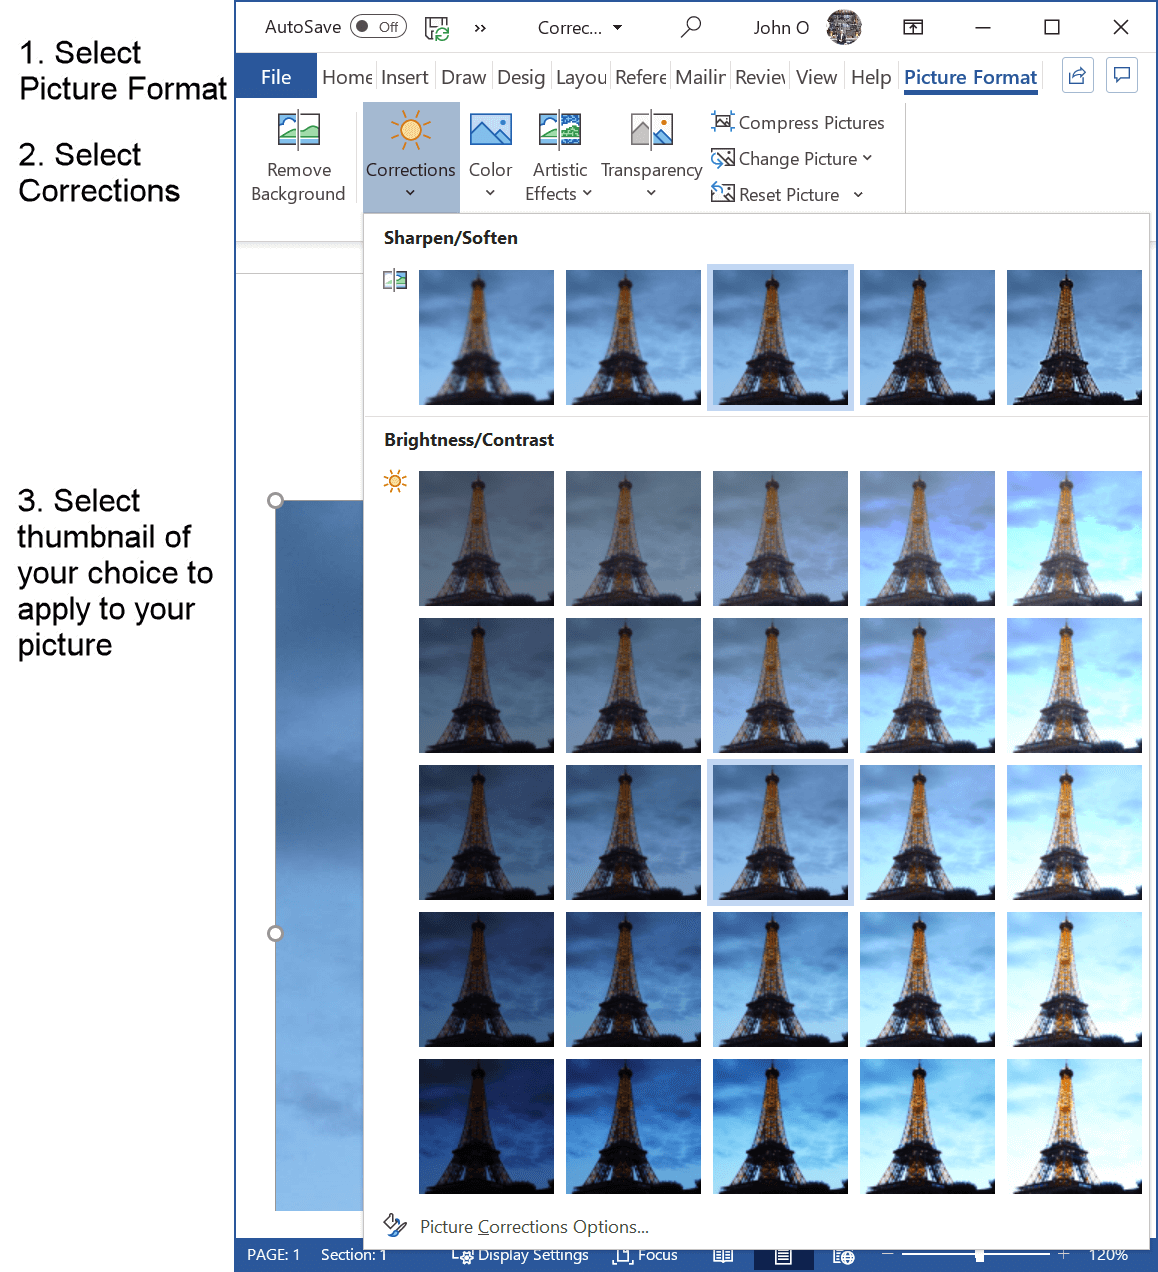 Figure 4: Brightness, Contrast and Sharpness Change in a Picture using Microsoft Word
Change the Look of the Picture
You can change the color of the picture (see Figure 5) you have inserted in your Word document.
Select "Color" (instead of "Corrections") from the Picture Format submenu (see Figure 4).
You can change the appearance of the picture (see Figure 6) you have inserted in your Word document.
Select "Artistic Effects" (instead of "Corrections") from the Picture Format submenu (see Figure 4).
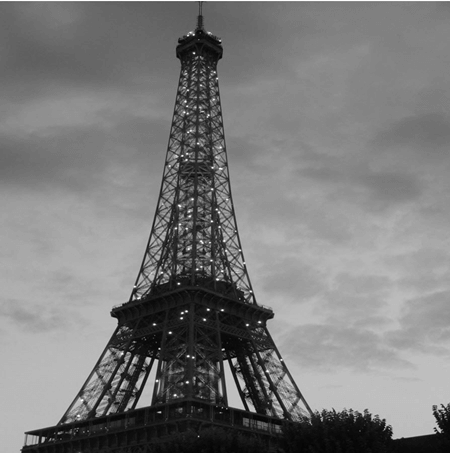 Figure 5: Eiffel Tower in Grayscale Produced by Microsoft Word Figure 5: Eiffel Tower in Grayscale Produced by Microsoft Word |
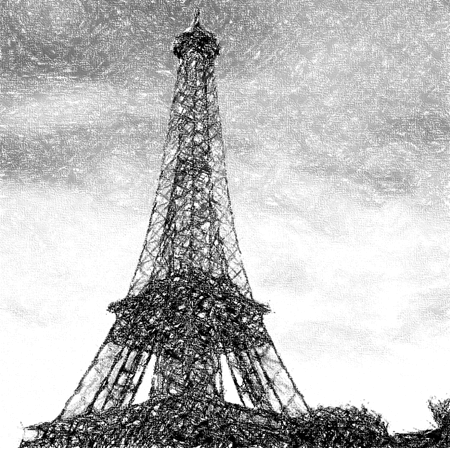 Figure 6: Sketch of the Eiffel Tower Produced by Microsoft Word Figure 6: Sketch of the Eiffel Tower Produced by Microsoft Word |
Compress the Picture
Microsoft Word allows you to compress images to reduce the size of your Word document.
Figure 7 shows you the options available.
The default resolution is 220 ppi (pixels per inch). This is satisfactory for most applications, so most times you do not have to do anything.
You may consider reducing it to 96 ppi if you are having trouble sending the document by email.
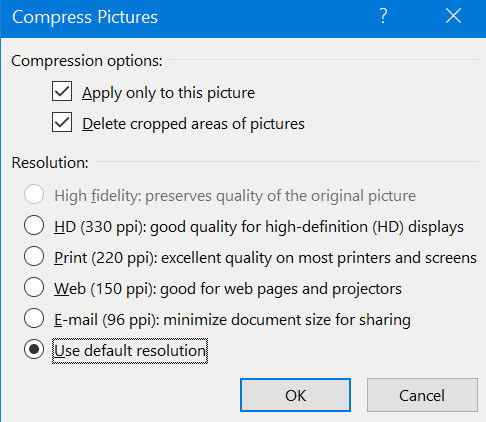 Figure 7: Compress Pictures in a Word Document
Figure 8 shows the result of compressing a document.
Each document contains the same pictures. The pictures (220 ppi) in the document were compressed to 150 ppi.
The file size has been more than halved.
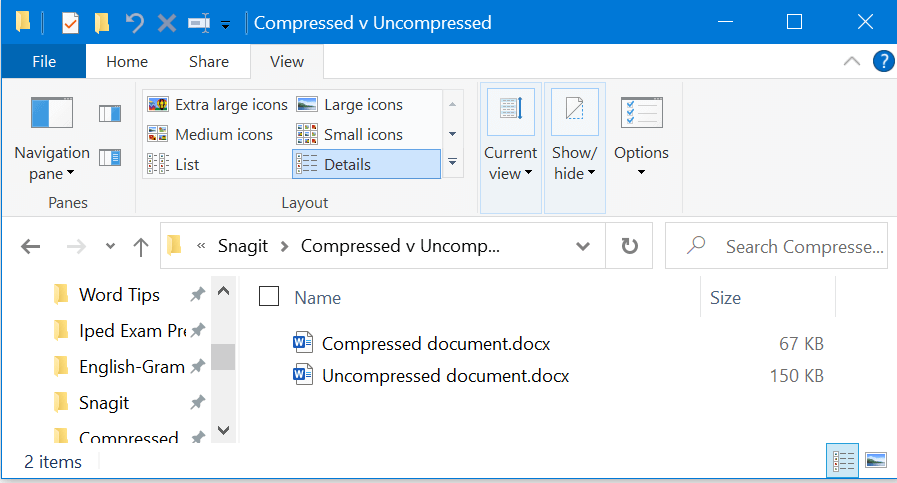 Figure 8: Comparison of File Size Before and After Pictures Compressed in a Word Document
Change the Transparency of Your Picture
Transparency tells you how much you can see through your image, that is, how much of what is behind you can see.
Microsoft Word inserts an image with 0% transparency. You can edit a picture in Microsoft Word (as shown in Figure 9) to change the transparency.
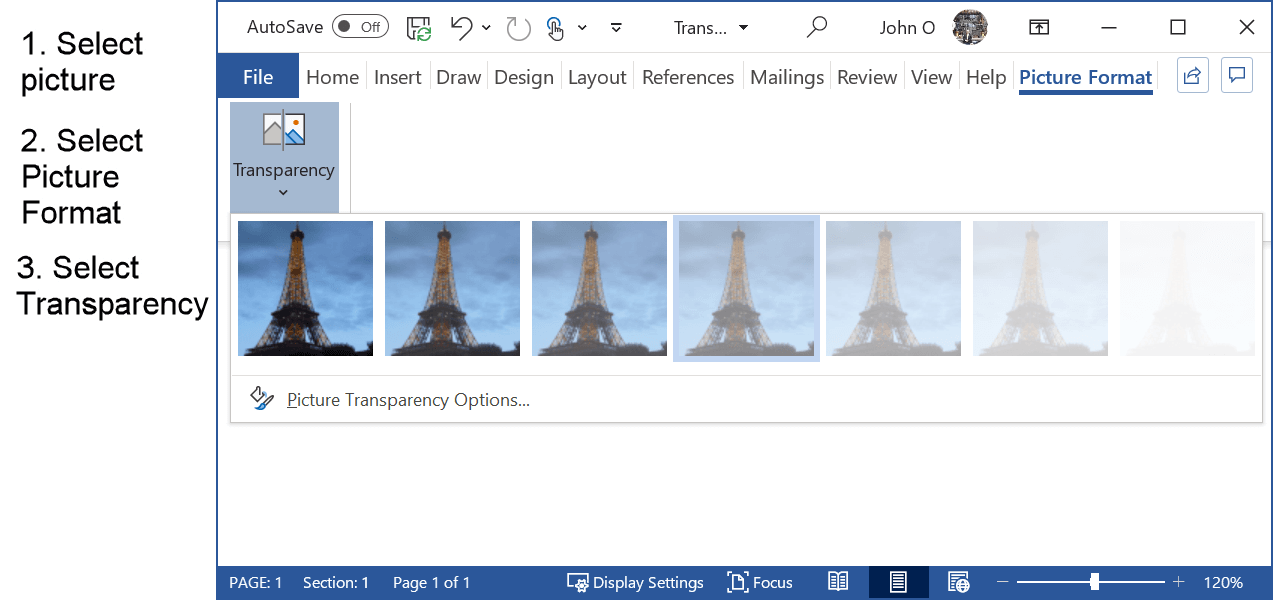 Figure 9: Steps in Microsoft Word to Change the Transparency of a Word Document
Figure 10 consists of two pictures. The Eiffel Tower picture has been placed on top of a picture of Paris.
The transparency of the Eiffel Tower picture has been changed to 50% - you can partly see through it.
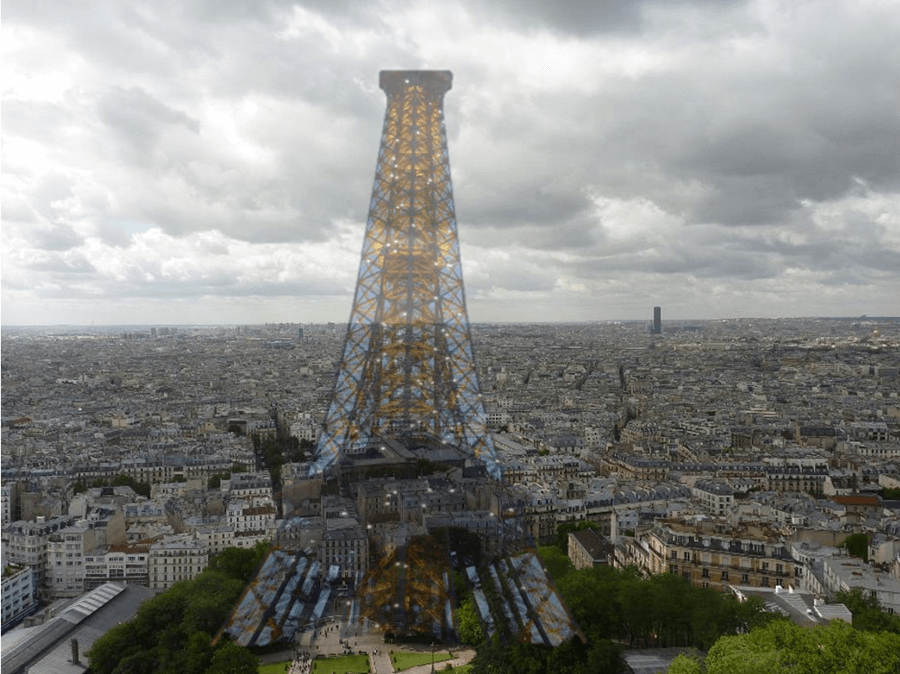 Figure 10: Eiffel Tower With 50% Transparency Overlaid a Picture of Paris
Choose a Border
A tool to edit a picture in Microsoft Word is the "Picture Border" tool.
You can choose a different border from a gallery of different borders (see Figure 11).
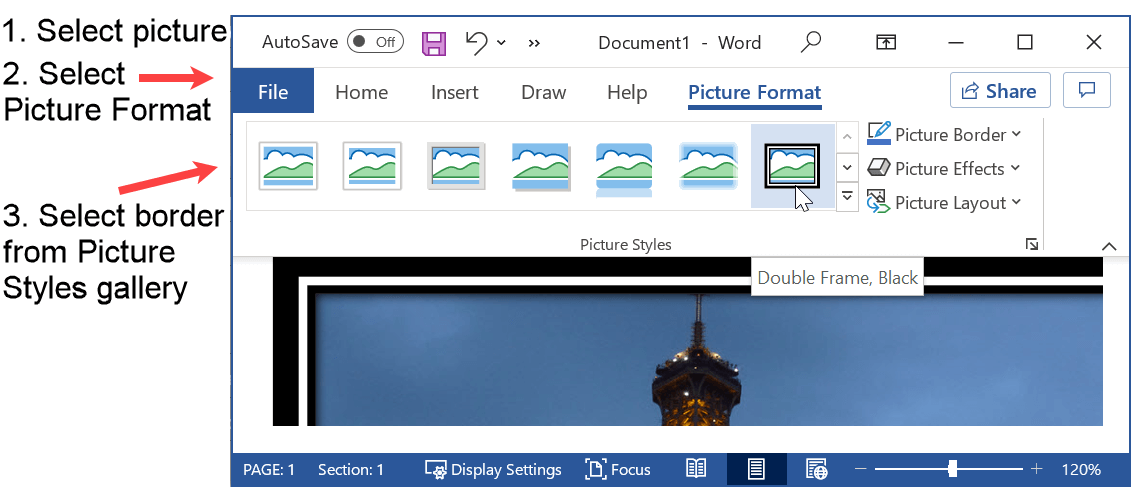 Figure 11. Select a Picture Border in Microsoft Word
You can further refine the look of the picture by using the Picture Border, Picture Effects and Picture Layout tools.
For example, Figure 12 shows the Eiffel Tower with a red border and reflection created from selecting Picture Border and Picture Effects (Reflections).
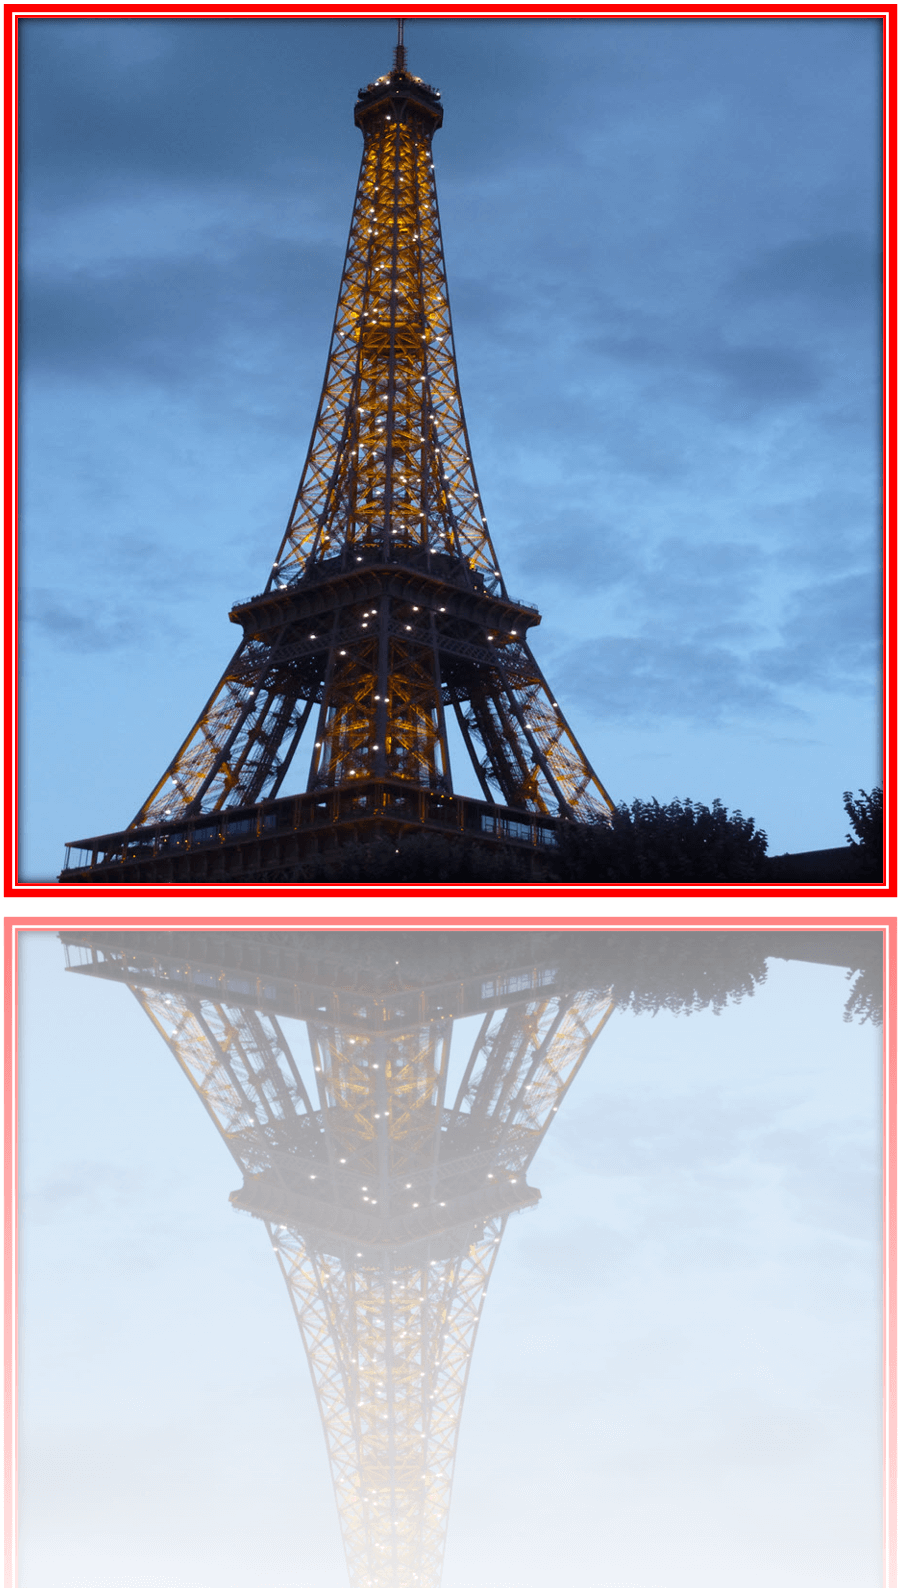 Figure 12: Eiffel Tower With Red Border and Reflection Created in Microsoft Word
How to Change the Size of the Picture in Microsoft Word
You may wish to change the size of the picture to fit better on your Word page.
Making the picture smaller should in theory increase the clarity of the picture as the same number of pixels are squashed into a smaller area.
However, you will not notice the difference.
Making the picture larger should in theory decrease the clarity of the picture as the same number of pixels are placed in a larger area.
However, once again, you will probably not notice any difference.
In any case, you cannot make the picture too large because part of it will go off the page.
You can easily experiment by making the picture smaller or larger (see Figure 20) and choosing which size you think is best.
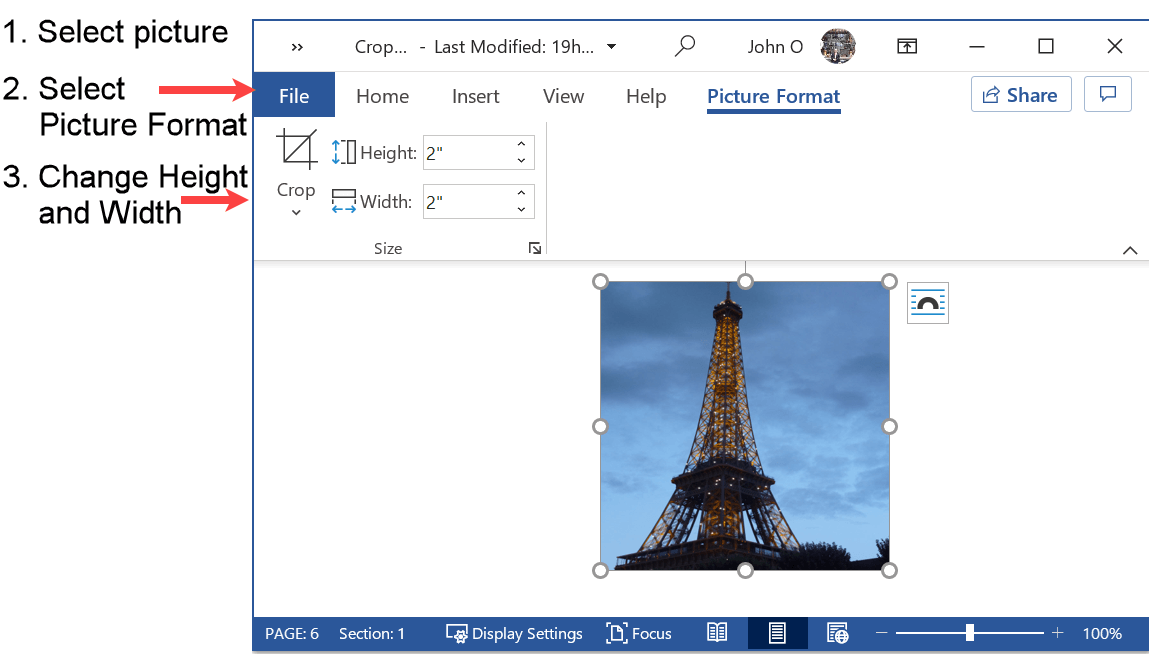 Figure 20: Resize a Picture in a Word Document
How to Edit a Picture in Microsoft Word - Summary
The above tools are very useful if you want to edit a picture in Microsoft Word.
More sophisticated editing tools, such as Photoshop, are great but take time to master. If you are not familiar with specialized photo-editing software, the picture editing tools in Microsoft Word are easy to use (as shown) and will be sufficient for many needs when inserting pictures in a Word document.
More information about editing a picture in Microsoft Word is found here.