- Home
- APA Paper Format
- Margins
Margins in APA Format
Use 1-inch (2.54-cm) margins on the top, bottom, left, and right sides of your paper.
Microsoft Word normally uses 1-inch ((2.54-cm) margins for new documents. However, the margins may have been changed, so check them before you begin writing.
See Figure 1 for how to check that the top, bottom, left, and right margins are 1 inch (2.54 centimeters).
See Figure 2 if you want to change the default margins for new documents.
If your paper is to be printed and bound (e.g., dissertation, thesis), different margins to allow for binding may be necessary (see Figure 3).
Check Margins in APA Format
In the Word document, select Layout > Margins.
The highlighted option shows the margin settings applied to the current document.
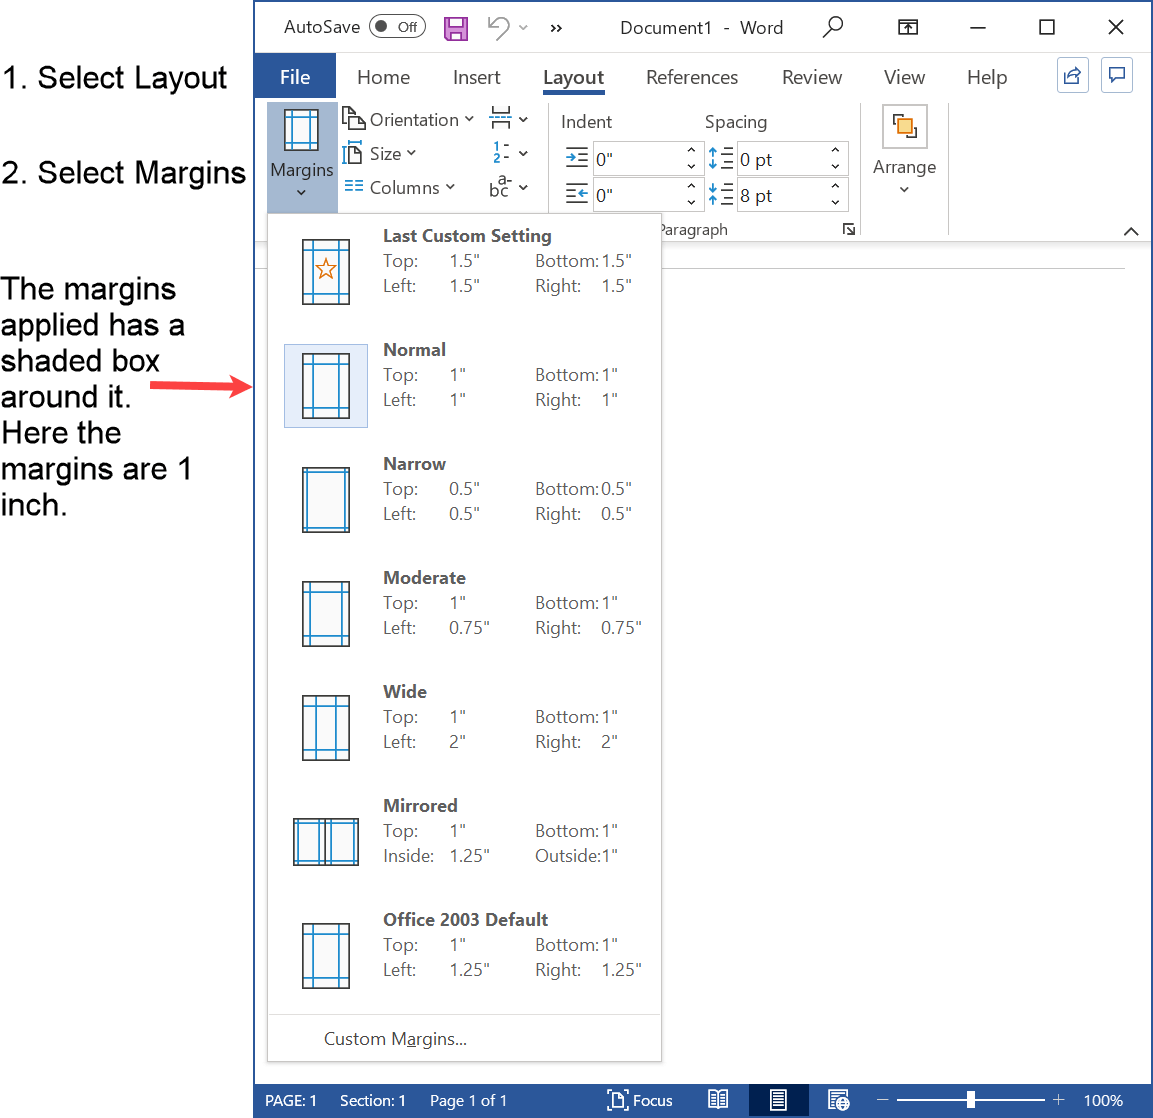 Figure 1: Check That Margins Are in APA Format
The highlighted option shows the margins applied to the current document.
In Figure 1, the Normal setting is selected, with 1-inch margins on all four sides.
If Normal is selected, your margins are already in APA format.
If another setting is selected, select Normal to apply 1-inch margins.
This changes the current document but does not change the default margins for new documents.
Set Margins in APA Format as the Default
If the default margins are not in APA format, select "Custom Margins" (see Figure 1), and follow Figure 2.
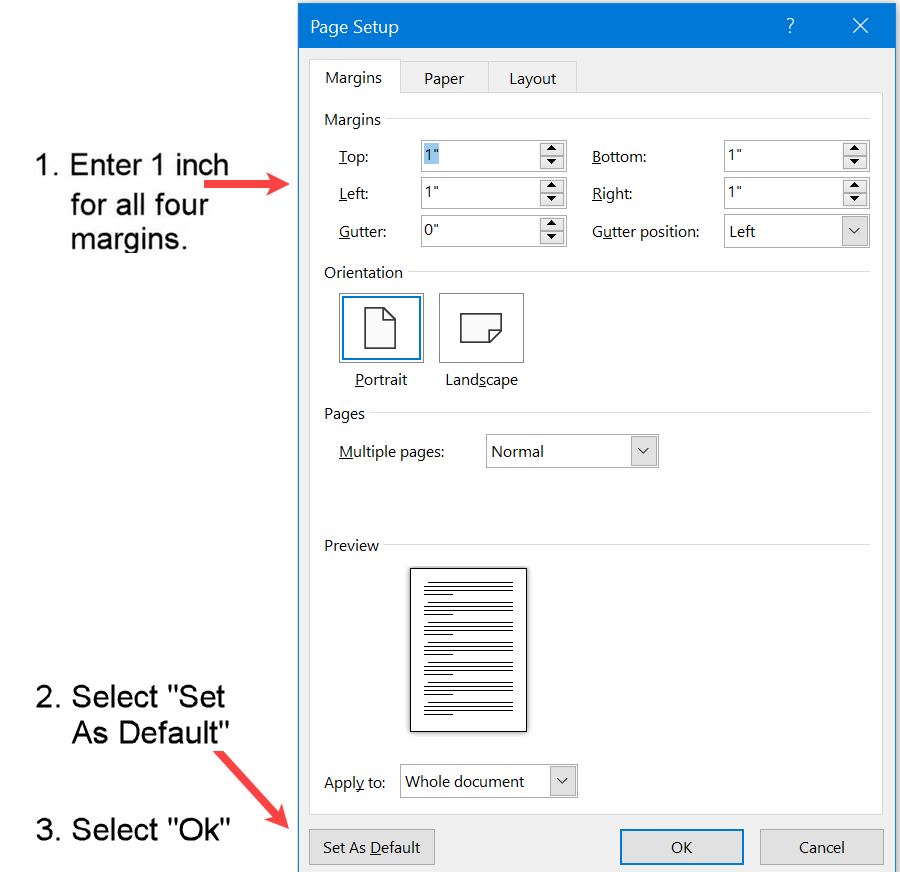 Figure 2: Set APA Margins as the Default in Word
- Enter 1 inch for the top, bottom, left, and right margins.
- Select Set As Default.
- Select Yes to confirm the change.
- Select OK if the Page Setup dialog remains open.
Change Margins for Printing
If your academic paper is to be printed and bound, your institution may require a wider inside margin to allow space for binding.
Single-Sided Printing
If you are printing on one side of the paper only, then increase the left margin as follows:
- Select "Custom Margins" (see Figure 1).
-
Increase the left margin to the measurement required by your institution (see Figure 3).
Figure 3 uses 1.25 inches as an example, not a universal requirement.
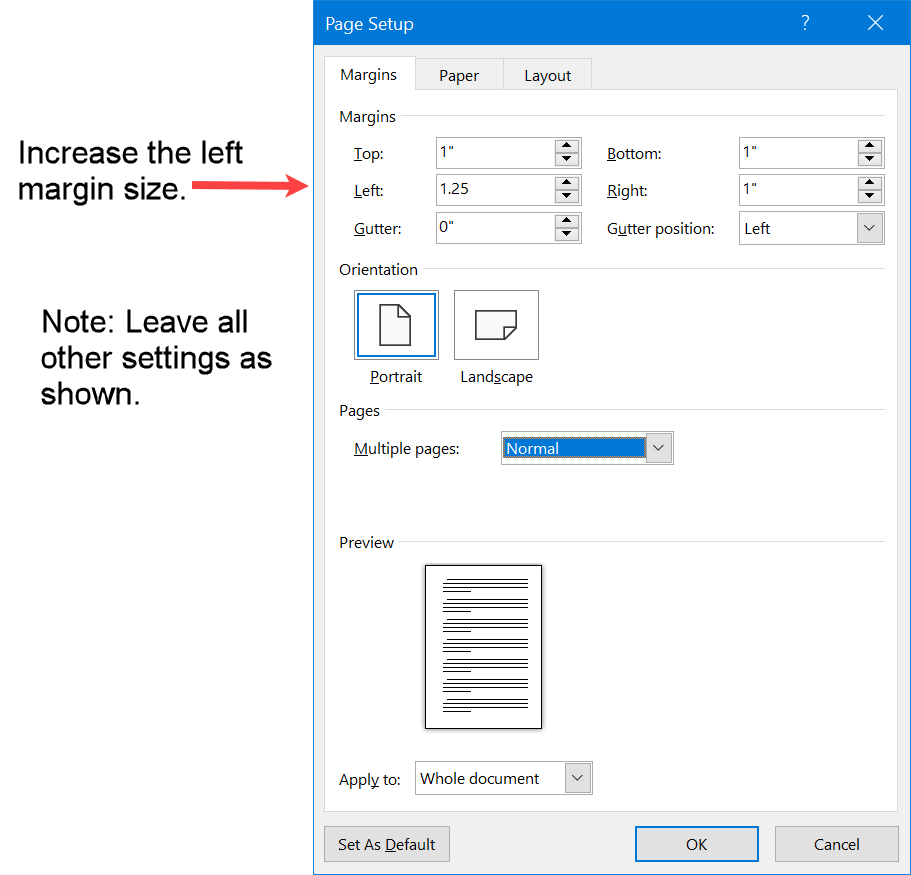 Figure 3: Change the Margin for Single-Sided Bound Printing
Double-Sided Printing
For double-sided printing, use mirrored margins.
Microsoft Word automatically places the wider inside margin on the left of odd-numbered pages and on the right of even-numbered pages.
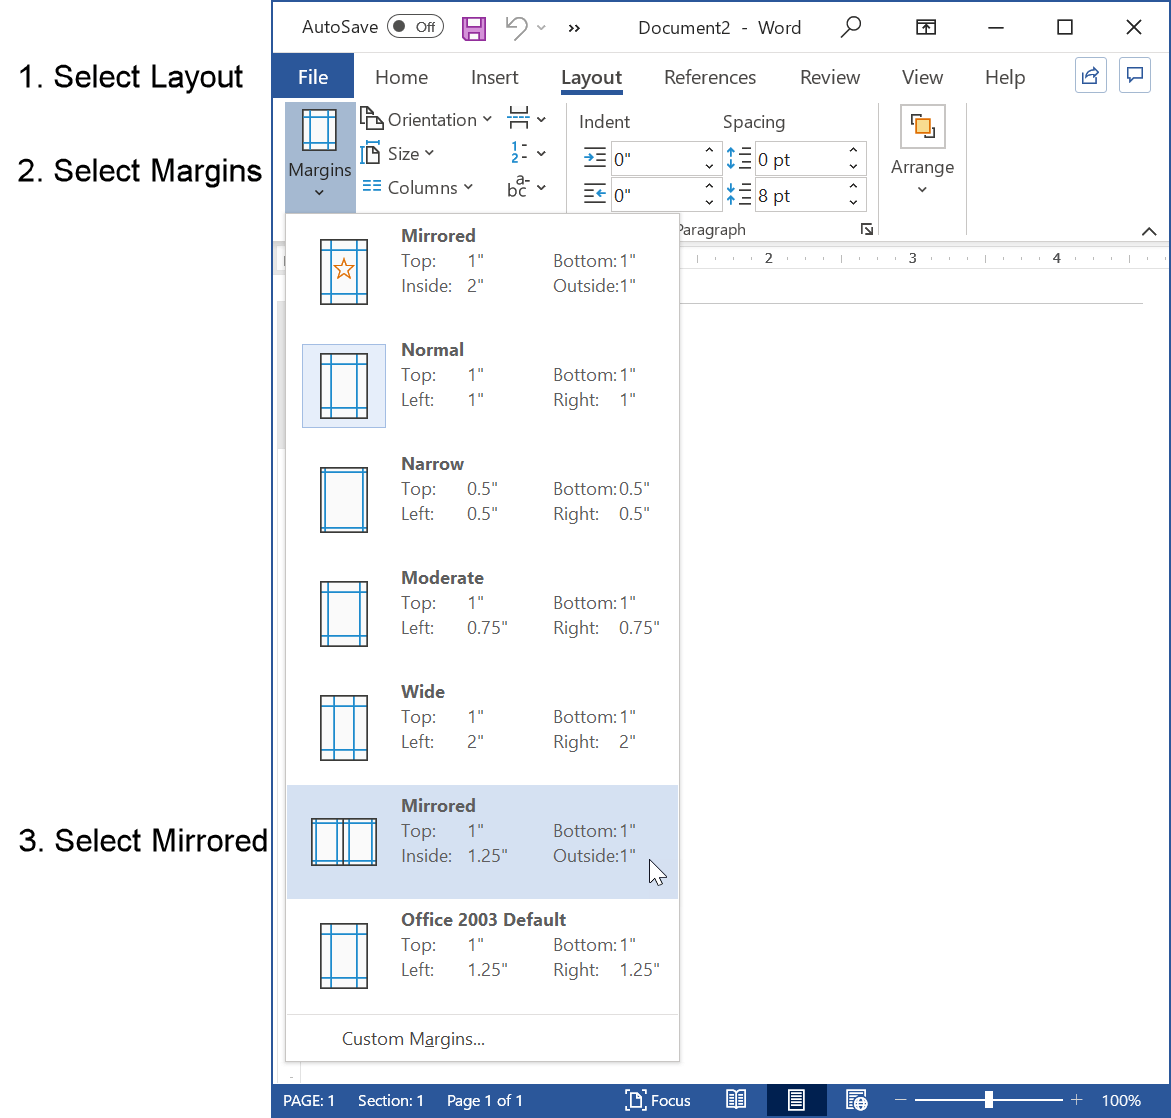 Figure 4: Set Mirrored Margins for Double-Sided Printing
To use an inside margin other than 1.25 inches, follow these steps:
- Select "Mirrored" (see Figure 4).
- Select Margins, then select "Custom Margins".
- Change the inside margin to the required measurement (e.g., 1.5 inches).
- Select "OK".
Summary
Microsoft Word normally uses 1-inch margins on all four sides of a new document.
Just check (see Figure 1) and you should be set.
If the default has been changed, then change it back so that your margins are in APA format (see Figure 2).
If you are printing and binding your paper, then you need some extra space to allow for the binding (see Figures 3 and 4).